Showing posts with label Stamp Set - Mixed Bunch. Show all posts

Tuesday, 19 June 2012

Quick and simple card making

Morning,

Quick post today, I just wanted to share this card with you.  It's an unusually size as it is 3" x 6".  It's a great size card to make if you have any 12"x12" cardstock as you can get 4 cards from it with no waste.

It's makes the perfect quite and simple card if you have to make a batch of "Thank You" cards or invitations or you want to make a few matching cards for a gift.


I used the wonderful stamp set "Mixed Bunch", which I absolutely love all the images and having the matching punch just makes it easy-peasy to create great cards.

I stamped and punch out an addition centre and popped it up and added lots of glitter to create a lovely sparkly centre.


Hope you like it, chat again tomorrow when I'll be back with another very colourful card. ... xx

 
Project Ingredients

Stamp Sets : "Mixed Bunch" & "Tea Shoppe"
Card stock : "Pool Party"; "Poppy Parade"  & "Whisper White"
Accessories : "Dazzling Diamonds" glitter
Colour:  StazOn Ink; "Poppy Parade" & "Daffodil Delight"classic Ink pads
Tools : Tape runner adhesive;  Dimensional adhesive; 2-way glue stick & "Blossom" punch

Thursday, 31 May 2012

Thumping Technique Card

Hello,

Today I wanted to share with you a simple card that shows off the "Thumping Technique"


To do the "Thumping Technique" you ink up your stamp in the normal way then you use a marker pen to tap on colour in various places around your stamp to introduce a contrasting colour.  The only thing you should remember is to ink up with the lightest colour first.

"Thumped" image

This technique produces a really pretty image.  In mine I only used two colours, but there is no reason why you couldn't use more if you want a really multi-coloured image.

Here's a video I found on You tube that explains it a bit better as I this technique is really very easy but defiantly benefits from visual instructions rather than written ~ Oh, and it's only just over a minute long and gets quickly to the point, which is nice.


Hope you find it interesting ..... xx

 
Project Ingredients

Stamp Sets : "Mixed Bunch"
Card stock : "Whisper White" & "Rose Red"
Accessories : "Twitterpated"  DSP; 3/8th" Pleated Satin Ribbon in "Blushing Bride"; Rhinestones
Colour:   "Blushing Bride" & "Rose Red" classic ink pad & "Rose Red" marker pen
Tools : Tape runner adhesive; Dimensional adhesive & "Blossom" punch

Sunday, 20 May 2012

Gift bag & Mini Cards

Hello,

Late posting today as I've not been sleeping too well lately so I allowed myself a slow and relaxing day today.

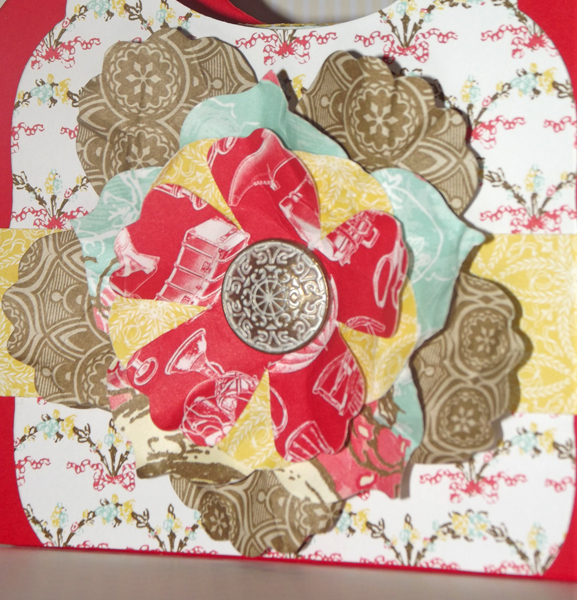
My share for you is a gift bag and some little 3" x 3" cards to go with it, oh, and some hand made envelopes too.


We learnt how to make the bag at our regional training a few weeks ago.  I utilises the wonderful "Labels Collection" framelit dies that are in the current Summer Mini catalogue.


The 3" x 3" cards fit in perfectly, and I made envelopes for them all out of the same DSP using the Diagonal board for "Simply Scored Scoring Tool", that is also in the Summer Mini.


The envelopes start life as a piece of 5" x 5" DSP and scored on the diagonal plate at 2-1/4" on all four sides.  I love making my own envelopes, it gives you total freedom to make any size card you want, but obviously there are some restrictions on how small you can get if you want to put them in the post.

The flower on the gift bag was made up from a combination of dies and punches.


I was really fun to make this project, especially after all the CAS cards I've been making recently and would be a perfect Teachers end of year gift or a little present for a friend or co-worker.

If you would like to learn how to make this gift or found  out more about any Stampin' Up product, then please do not hesitate to get in touch and we can sort out a workshop in the comfort of your own home for you and your friends.

Take care...


Project Ingredients

Stamp Sets : "Mixed Bunch" & "Tiny Tags"
Card stock : "Poppy Parade" & "Whisper White"
Accessories : "Attic Boutique" DSP; Silver Brads & Antique Brads
Colour:   "Soft Suede", "Pool Party" &  "Poppy Parade" classic ink pads
Tools : Tape runner adhesive; Dimensional adhesive; Simply Scored Scoring Tool; Diagonal Scoring Plate; "Fun Flowers" die; "Fancy Flower" punch; "Labels Collection" die & "Jewellery Tag" punch

Monday, 7 May 2012

Scrapbook Page - From regional training

Hello,

Hope everyone had a fabulous bank holiday weekend. I'm trying to sort out one of my rooms and it seems like I am making more mess than less!  Defiantly a couple of trips to the recycling bank for me this week.

My project  today is a scrapbook page that was part of our 'Make n Takes' at Stampin' Up's regional training recently.  I actually bought my kit home to make as, for me, scrapbooking is all about the journalling and that is something that cannot be rushed.


The photo is really rubbish.  There has been no sunny days lately so I had to take the photo inside and no matter how I tried I kept getting loads of glare on the photo, so I had to take it at this very weird angle.

I even tried putting it into my scanner, but it only scans at A4, so not that helpful, but at least this image shows the detail of the page nicely, especially if you open the image in a new tab or window.

The photo is of my son when he was little intensely investigating some flowers, I think there may have been a bug of some kind on them which was holding his attention.  Even though we lived in the center of London, he was always happiest when we were surrounded by nature, luckily we lived near Kensington Gardens so we spent many many happy hours in there.  Even though he is grown he is still happy to wonder round the park with his Mum, though our park now has wild deer, rabbits and parrots, so it's a bit different that a central London park.


Project Ingredients

Stamp Sets : "Mixed Bunch"
Card stock : "Baja Breeze"  "blushing Bride" cardstock;  textured "Pear Pizzazz" & Watercolour paper
Accessories : "Twitterpated" DSP; "Lucky Limeade" bakers twine; various buttons & Wire clip from "Clips Assortment"
Colour:   "Baja Breeze" classic ink pad &  "Pear Pizzazz" marker pen
Tools : Tape runner adhesive; Dimensional Adhesive, 5-Petal Flower" punch; "Fancy Flower" punch; "Blossom" punch & "Scallop Border" punch.