Sunday, 16 December 2012

ABAC Sunday ~ Christmas Tree decorations

Hello, my Anything But A Card, (ABAC), Sunday this week I am sharing a little Christmas Tree decoration that I made using the mug die from the 'Holiday Collection' framelit dies.


I cut 2 of the little mug shapes with a little extra cardstock at the bottom so that I would have somewhere to adhere the two pieces together.  I then used my Crop-a-dile to punch a hole in the 'handle' section of the mug.

This makes them look like little hand-bags - which is very cute!
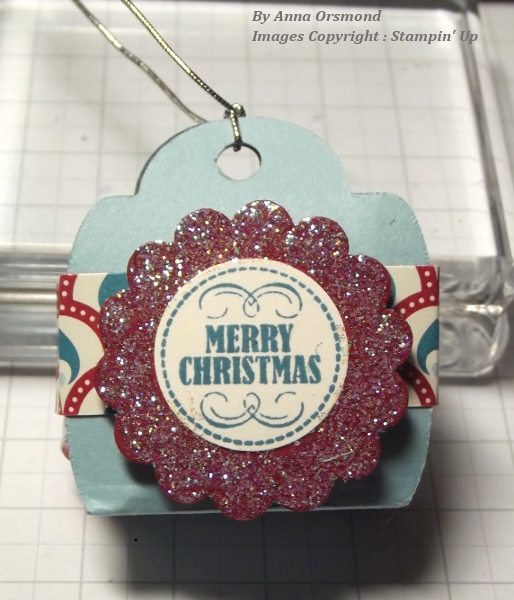

I added a little chocolate from my trusty tub of "Celebrations" and wrapped a piece of DSP from the 'Festival of Prints' paper stack round the middle to hold it closed.  

On the blue one, I used the 1-1/4" Scallop circle punch to punch out a 'Cherry Cobbler' scallop circle.  I used 'Island Indigo' ink pad to stamp out an image from the 'Mixed Medley' stamp set and adhered it to the centre of the scallop circle using 'Snail' adhesive.  I then used the '2-way glue pen' round the outside edge of the scallop circle and covered it is 'Dazzling Diamonds' glitter.    


On the 'Real Red' one, I used adhered a 'Vintage Faceted Designer Button' that using glue dots after I had threaded through and tied a bow using some silver cord from my stash.  I used the same cord threaded through the hole in the mug's handle area to that they could hang from the Christmas tree.

I'm going to try and do a very quick tutorial on this and post later today.  See you then ....xx

 **THIS IS A STICKY POST ~ PLEASE SCROLL DOWN FOR LATEST BLOG ENTRY**

SPECIAL PROMOTION DETAILS:

A hostess who holds a workshop between 1st November and 16th December can earn themselves a FREE collection of the new style Classic Stampin' Pads - that's 10 full sized ink pads for FREE

If the orders from your workshop reach a minimum of £325, (or 475 Euro's), then you get to choose the ink pads from the 'Brights' Subtles' or 'Regals range and you get all ten of them with a value of £44.50, (59,95 Euros), as well as your regular hostess gifts ~ that really is "ink-redible"!

Drop me an email today to find out more information.

techiebell@hotmail.co.uk

Saturday, 15 December 2012

Saturday Inspiration - Part 2 ~ You tube inspiration

I know, 2 posts in one day but I wanted to share two lots of cards with you today to make up for not blogging much recently.

I was inspired to make this card after seeing an ad for a video by Kristina Werner, I haven't see the video, just saw the card.


I've used my favourite wheel again, 'Musical Notes' which I've just been obsessed with this year.


I used the same basic layout as the card I saw on You tube and did it in two colour ways, 'Real Red with 'Very Vanilla'  which seems all warm and cosy to me.


The other colour way is 'Whisper White', 'Midnight Muse' and 'Bashful Blue'.  Using blues makes the card look all frosty, which is another thing I've been obsessed with this year.


I used one of the embossing folders from the 'Delicate Designs Folders' duo pack.  I know it isn't snow, but it really gives the impression of it.  The little snow flake stamped image is from the 'Make a Mitten' stamp set, and obviously I've used the 'Mitten' punch for the mittens, which is so adorable.

Hope you like them, have a great weekend ..  xx

Saturday Inspiration - Pinterest

Hello,

I've seen lots of Christmas Present type cards on Pinterest recently, and this style stayed in my mind for some reason so I had to give it a go.


As you can see, the style is very simple and easy to replicate with very little in the way of supplies.


I think a card like this would be perfect for a male card, which is great for me as I have a few single male friends and relatives that are always a bit difficult to choose a card for.


They are good for girlies too, you just have to choose a more feminine embellishment 


This card has the gorgeous 'Vintage Faceted Designer Buttons'.  I also sprayed both cards with the 'Champagne Mist' shimmer paint that I've mixed with Surgical Spirits, which makes it perfect for spritzing.  

Unfortunately, I don't remember who made the card that inspired me, but if anyone know's please let me know so I can give them credit.

Friday, 14 December 2012

Quick Christmas card


Sorry I've not blogged for a while, combination of not being able to access by blog and working away from home.

Anyway, I've got a quick project to share with you.


It uses the 'Heart of Christmas' stamp from the Autumn/Winter mini catalogue.  It's a great little stamp as you can whip up lots of cards really quickly.


I teamed it up with 'Whisper White' card stock that had been embossed using different embossing folders and with just a small matt of 'Real Red' card stock to make it pop even more.  The little snowflake stamp is from the 'Make a Mitten' stamp set, which is just adorable.

That's it for now, I have been crafting, so lots to show you so lots to blog about, lets just hope blogger lets me.   xx

Monday, 26 November 2012

'Christmas Present' Cards

My project share with you today is a 'Christmas Present' card.  These are so easy to make and a great way to use up scraps.

(Sorry about the dodgy lighting on these!)


I made a traditional green and red card and a slightly less traditional blue and red card.  For some reason I'm really loving blue on my Christmas cards this year.


These are so easy to make.  I made mine by attaching a piece of DSP to a piece of cardstock just a little bit taller than the DSP. I used Stampin' Up's  "Festival of Prints" paper stack, which, for only £6.25 for 48 sheets is great value. Then doing the same thing again but this time using a piece of cardstock that was a little bit taller but a little bit narrower.


The top section is just the DSP.  I use a thin piece of scrap cardstock and put my parcels on to that using snail adhesive which gives me a solid piece. I ran my glue pen on the exposed pieces of cardstock and covered them in "Dazzling Diamonds" glitter 

Ooo ~ sparkly!

I then wrap my ribbon around the parcels and tie off at the top. The additional piece of scrap cardstock helps with this also.  I put dimensional adhesive on the back and pop onto the card ~ done.  

Hope you like this project and get inspired to make some for yourself... enjoy!  xx


Sunday, 25 November 2012

ABAC Sunday - Mini Bags

Hello there,

Hope you are having a lovely weekend, I am having a very lazy one as I know that next weekend is going to be crazy busy so I'm making the most of the peace and quiet whilst I can, and can you believe that next weekend is December, how scary is that.  Oh and before you ask, I am defiantly NOT ready for the big day yet, I've made about half my cards and I haven't bought a thing yet ~ thank god for internet shopping and direct delivery!

Anyway, for my project today I've made a couple of little bags to share with you and I've made them deliberately made them in non-Christmas themed DSP.


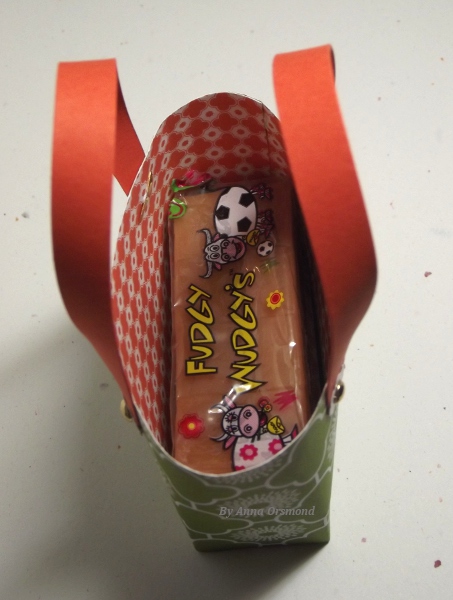
They measure 3 x 7cm, so small and cute.  I made them this size as I had bought little packets of fudge and I made them to be perfectly sized to house them.  (see last photo.)


I made one without a clasp and one with, just to see the difference.


I think I prefer the one with the clasp, and as they are so small, they would make perfect little Christmas tree ornaments, as long as the goodies inside weren't too heavy.


I originally made the one without the clasp as I wanted to fit lots of the little packets of fudge in and volume of goodies is defiantly of interest to the little person this was originally made for but even the one with the clasp had enough room for 2 packets, so if you had a small piece of jewellery wrapped in tissue, this bag would be the perfect size.

I'm going to try and get a tutorial done on this for next Sunday, work allowing.  Take care... xx